

Fonts are essential in web design, shaping a website’s character and personality. They convey emotions, style, and identity to the audience. Wix offers default fonts, but custom fonts can add uniqueness and originality. This guide explains how to add fonts to Wix website, ensuring it resonates with the brand’s identity.
It’s important to understand that fonts come with licensing considerations, so choosing the right fonts and securing necessary licenses is crucial. You may use paid or free version of fonts. Custom fonts can set the tone for elegance, minimalism, or boldness, leaving a lasting impression on visitors. By exploring the world of custom fonts in Wix, you can transform the way your website looks and feels.
Preparing Your Custom Font
Before you can infuse your Wix website with custom fonts, it’s crucial to undertake some essential preparations to ensure a seamless integration. Here’s how to get your custom font ready:
A. Choose a Font
- Font Selection: Start by choosing the custom font that best complements your website’s design and aligns with your brand identity. Whether you’re seeking a classic serif, a modern sans-serif, or something entirely unique, there’s a font out there for you.
- Licensing Matters: Be mindful of font licensing. Some fonts are free for personal and commercial use, while others may require a license or purchase. Always check the font’s licensing terms and conditions to avoid any legal complications.
B. Download the Font Files
- Font File Formats: Fonts come in various file formats, such as .woff, .woff2, .ttf, and more. Ensure you download the appropriate format(s) compatible with web usage. WOFF (Web Open Font Format) and WOFF2 are widely supported and recommended for web projects.
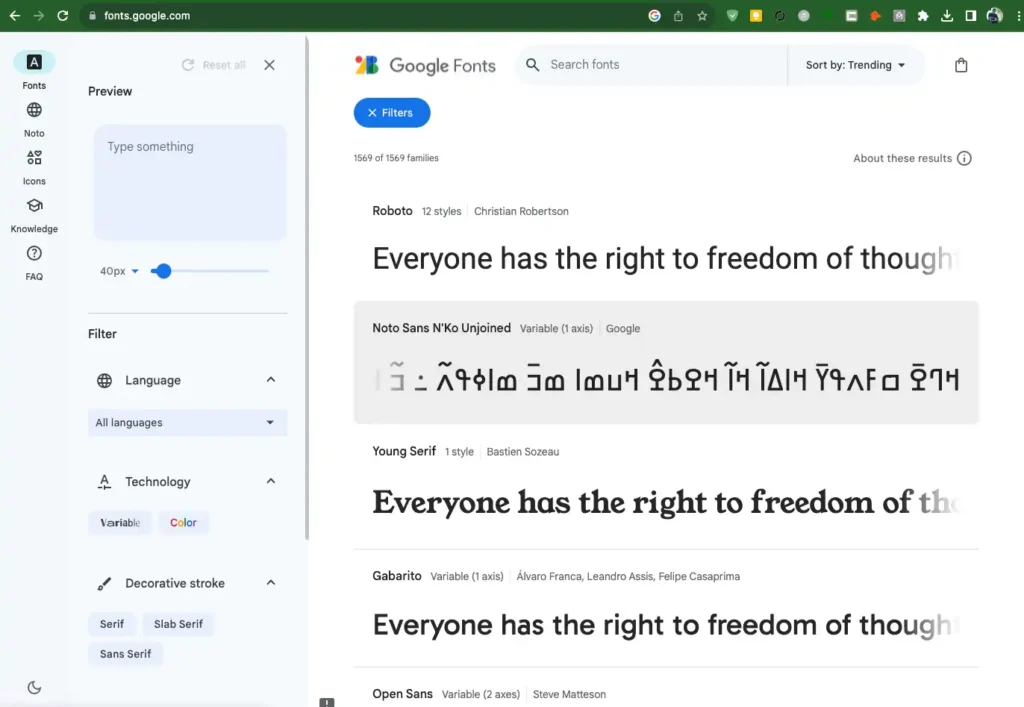
- Trusted Sources: Obtain your custom font from reputable sources, such as Google Fonts, Adobe Fonts, or established font foundries. These sources often provide high-quality, well-optimized fonts that are suitable for web usage.
C. Ensure Proper Licensing
- Review Licensing Terms: Carefully read and understand the font’s licensing terms and restrictions. Some fonts may be free for personal use but require a license for commercial applications. Ensure compliance with the font creator’s conditions.
- Obtain Licenses: If the font you’ve selected requires a license for your specific use case, purchase the necessary licenses. This is a crucial step to avoid legal issues and to support font designers and creators.
Step-by-Step Process On How to Add Fonts to Wix
Custom fonts can indeed be a fantastic way to make your Wix website stand out. If you prefer a written guide on how to add custom fonts to your Wix website, here are the steps you need to follow:
Step 1: Choose Your Custom Fonts
Before you can add custom fonts to your Wix website, you’ll need to obtain the fonts you want to use. Best places to find custom fonts is Creative Market (creativemarket.com/fonts). You can explore a vast collection of fonts, including discounted options, to suit your specific needs.
Step 2: Purchase and Download Your Chosen Font
Once you’ve found the font you like, add it to your cart and complete the purchase. After your purchase is successful, you’ll be able to download the font file to your computer. Or you could find free fonts, Fonts are typically provided in one of the supported formats, such as TTF (TrueType Font) or OTF (OpenType Font).
Step 3: Open Your Wix Editor
Now that you’ve acquired your custom font, open your Wix editor. It’s important to be logged in to your Wix account to make the necessary changes.
Click on Edit Site from right top on Wix dashboard

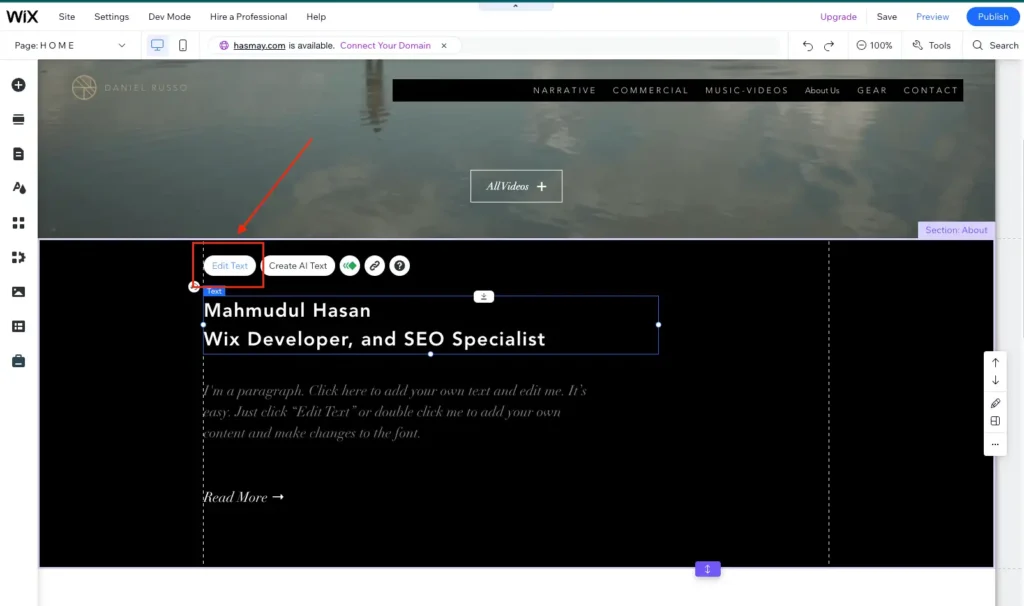
Step 4: Select Text and Edit
Choose any text element on your website that you want to style with your custom font. Click on it to select it, and then click the “Edit Text” option.
Step 5: Access the Font Menu
Within the text editing options, you’ll see a font selection dropdown menu. Click on it.
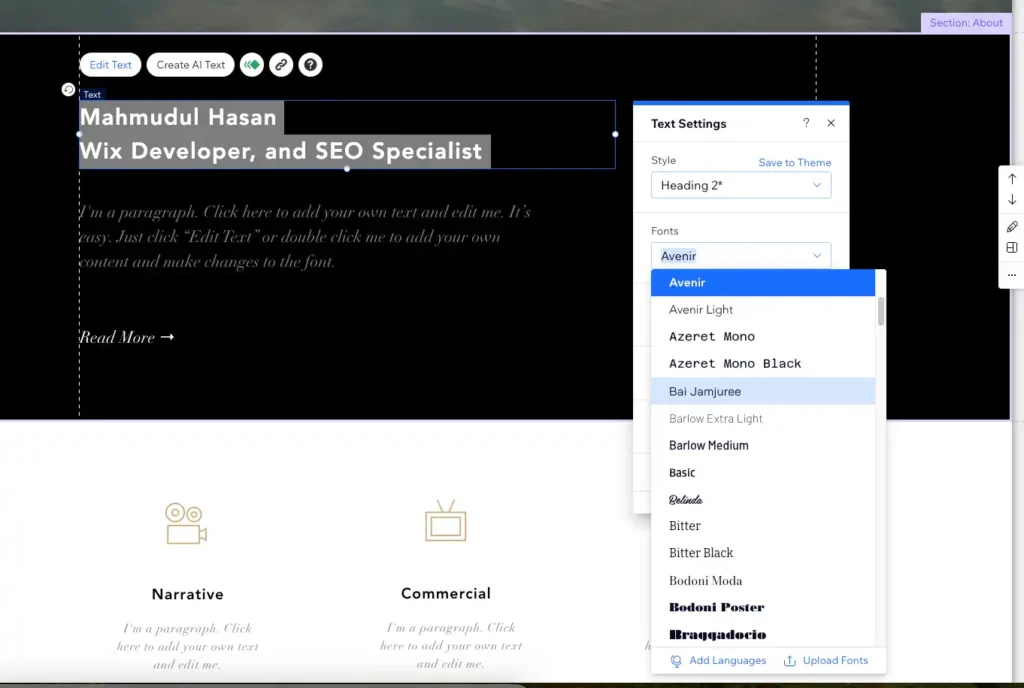
Step 6: Upload Your Custom Font
Scroll to the bottom of the font selection menu, and you’ll find an option that says “Upload Fonts.” Click on this option.
Step 7: Upload Your Font File
Clicking on “Upload Fonts” will prompt you to select and upload the font file you downloaded earlier. Wix supports various font file formats, so make sure you’re uploading the correct file.
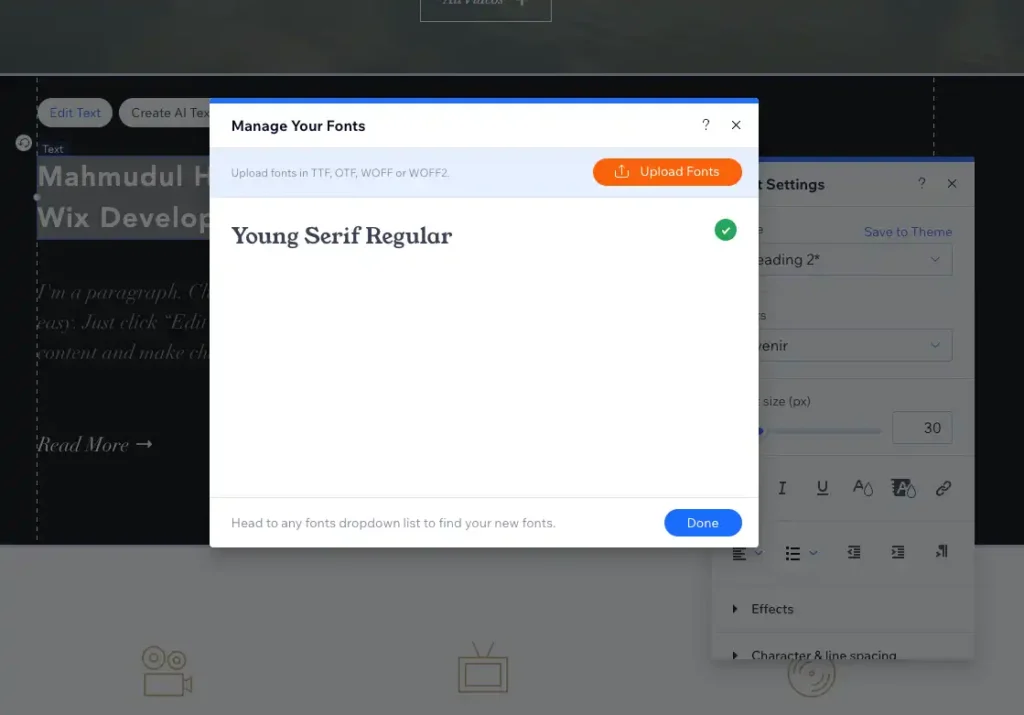
Step 8: Use Your Custom Font
Once you’ve successfully uploaded your custom font, it will be available in the “My Fonts” category. Simply select your newly uploaded font from the list, and your text element will now be styled using your custom font.

Step 9: Save Your Changes
After applying the custom font, remember to click the “Save” button to ensure your changes are saved to your Wix website.
With these straightforward steps, you can easily add custom fonts to your Wix website, giving it a unique and personalized touch. As Sarah mentioned, experimenting with different fonts can be a fun way to make your website stand out and cater to your specific brand or audience.

Whether you’re a beginner or an experienced web designer, custom fonts can add a unique touch to your website and make it stand out from the crowd. From elegant script fonts to bold and modern typefaces, there are endless options to choose from. Don’t hesitate to experiment and find the perfect font that reflects your brand’s personality. So go ahead, dive into the world of custom fonts and elevate your website’s design!
Video Guide on How to Add Fonts to Wix
How to Change Fonts On Wix
Let’s diving into the art of web design and showing you how to change fonts on your Wix website. The ability to customize fonts is a vital aspect of creating a visually appealing and unique website. With Wix, you have the flexibility to adjust fonts individually for specific text boxes or apply changes across your entire site. Let’s explore both methods to help you achieve the desired look for your website.
Method 1: Changing Fonts via the Site Theme
- Access the Site Theme: To begin, navigate to your Wix site’s dashboard. On the left-hand side, you’ll notice a symbol represented by a letter ‘A’ with a colored icon. This is the Site Design Editor.
- Customize Text Themes: By clicking on this icon, you can access various text themes, which include different heading and paragraph styles. These themes serve as a consistent set of font choices for your website.
- Edit Text Themes: Once you click on a theme, such as ‘Header 1,’ you’ll be able to make adjustments to the font. You can modify the font type (e.g., switching to ‘Braggadocio’), adjust the font size, color, boldness, and other stylistic elements.
- Apply Changes: After customizing your chosen text theme, you can apply it to your website. As soon as you save the changes, you’ll notice that it immediately reflects in the sections where ‘Header 1’ was used.
- Global Font Changes: This method allows you to change the text themes across your entire site. It’s a swift and efficient way to establish a consistent typography style for your web pages.
Method 2: Changing Fonts Individually
- Access the Design Panel: Exit the Site Design Editor and return to your website’s main design view. Here, you have the option to edit text boxes individually.
- Edit Text Boxes: Click on the text box you wish to customize. This action opens the text editing panel.
- Choose a Font: You can change the font for the selected text box directly. For instance, if you prefer the ‘Pacifica Condensed’ font for a particular section, you can make this change here.
- Utilize Themes: Additionally, you can apply the text themes like ‘Heading 1’ or ‘Heading 2’ to your text box. This provides a cohesive look if you want the text to match the established theme for your website.
- Customization Flexibility: This method offers flexibility and allows you to be more specific in customizing the fonts for different sections or text boxes on your site.
By following these methods, you can easily change the fonts on your Wix website to suit your branding and design preferences. Whether you want a uniform look across your entire site or desire custom fonts for specific sections, Wix provides the tools to make your website aesthetically pleasing and unique.
Remember, typography plays a significant role in user experience, so choose your fonts wisely to leave a lasting impression on your website’s visitors. Happy font styling!
That’s it for this tutorial on changing fonts on Wix. We hope you found it helpful and that it empowers you to create a beautifully designed website that captures your unique style and message.
Stay tuned for more Wix tips and tricks in the future!
Troubleshooting and Tips
This section provides troubleshooting solutions and tips to improve the font integration experience in Wix websites, despite potential challenges.
A. Common Issues and Solutions
- Font Not Displaying Correctly:
- Issue: Your custom font may not display as expected on your website.
- Solution:
- Verify that you’ve correctly uploaded the font files to Wix.
- Check for any typos or errors in the font family or style names.
- Ensure that the font’s licensing allows for web usage.
- Licensing Issues:
- Issue: You receive notifications or warnings about licensing violations.
- Solution:
- Double-check the font’s licensing terms to ensure compliance.
- If necessary, purchase or obtain the required licenses for your specific use.
B. Best Practices
- Choosing Legible Fonts:
- Opt for fonts that are not only aesthetically pleasing but also highly legible, especially for body text. Avoid fonts that are overly decorative or difficult to read.
- Maintaining Consistency:
- Stick to a limited number of fonts on your website to maintain visual consistency. Too many fonts can lead to a cluttered and unprofessional look.
- Testing Fonts:
- Preview your website with custom fonts on various devices and browsers to ensure they display correctly and maintain their visual appeal.
- Responsive Design:
- Ensure that your chosen fonts adapt well to different screen sizes and orientations. Test your site’s responsiveness to guarantee a smooth user experience.
- Loading Speed:
- Be mindful of the impact custom fonts can have on your website’s loading speed. Optimize fonts for web usage to minimize performance issues.
- Backup Fonts:
- Define fallback fonts in your design to ensure a consistent appearance even if the custom font fails to load on a user’s device.
- Regularly Check Licensing:
- Periodically review and renew font licenses to avoid any future legal issues.
By addressing common issues and following best practices, you’ll enhance the overall user experience of your Wix website with custom fonts. Your typography choices can have a profound impact on your site’s aesthetics and functionality, so take the time to get them right.
Additional Guide
🔍 Looking to supercharge your Wix website? Explore these handy guides for more website-enhancing tips and tricks:
- How to Add a Pop Up on Wix – Elevate user engagement with this step-by-step guide to create eye-catching pop-ups: Read more
- How to Delete a Page on Wix – Streamline your site’s structure in just three simple steps. Learn how: Read more
- How to Add Google Reviews to Wix Website – Boost credibility and trust with authentic reviews. Find out how: Read more
- How to Change Domain Name on Wix – Ready for a rebrand or a new domain? This step-by-step guide has you covered: Read more
- How to Change Wix Template – Refresh your site’s look with a new template. Discover the process here: Read more
- How to Get a Picture in a Lightbox Wix – Make your images pop with a lightbox effect. Learn the easy steps: Read more
Dive into these resources to master the art of Wix website design and functionality. Your site’s potential is limitless, and these guides will help you unlock it!
Conclusion
Custom fonts are a crucial aspect of web design, as they transform a website into an engaging, memorable, and unique digital experience. They convey a brand’s personality, capture visitors’ attention, and guide their eyes through content. By embracing custom fonts, you can tell your story in a way that is truly your own. This guide teaches you how to add fonts to Wix and to choose the right fonts, prepare them, upload and integrate them, and troubleshoot and optimize them.
Your website will make a lasting impression, resonate with your audience, and effectively communicate your identity. The chosen fonts will shape the perception of your brand, imbuing every word with personality and purpose. The world of fonts is vast and filled with opportunities for creativity. As you refine your website, don’t hesitate to explore new fonts, experiment with different styles, and push the boundaries of your design.
Typography is a powerful tool in your web design arsenal, and it can set you apart from the crowd. So, go forth, continue to innovate, and make your digital mark with the power of custom fonts. Your audience is waiting to be captivated, and your message is ready to be elevated. Embrace the world of custom typography and watch your website come to life.