
Creating an engaging and visually appealing website is crucial in the digital era to capture the attention of your audience. One effective way to showcase images and photographs on your Wix website is by utilizing a lightbox. A lightbox is a user-friendly feature that allows you to display images elegantly and interactively, thereby enhancing the overall user experience. Let’s explore how to get a picture in a lightbox wix.
This guide aims to walk you through the process of getting a picture into a lightbox on your Wix website. Whether you are an aspiring photographer, an online retailer, or just someone looking to present images in a professional and captivating way, implementing a lightbox can significantly improve your website’s visual appeal.
By following the steps in this blog post, you will learn the skills and knowledge required to seamlessly integrate a lightbox into your Wix site. Whether you are a novice or an experienced web designer, this guide will prove to be a valuable resource for enhancing your website’s image presentation. Let’s dive into the steps required to achieve this impressive effect and take your website to the next level.
Step-by-Step Guide: How to Get a Picture in a Lightbox Wix
Setting Up Your Wix Website
Before adding a picture to a lightbox on your Wix website, ensure that your website is set up for customization. Follow these essential steps to set up your website:
1. Ensure You Have an Active Wix Account:
- If you don’t already have one, sign up for a Wix account at www.wix.com.
- If you have an existing account, log in with your credentials.
2. Access Your Wix Dashboard:
- After logging in, you’ll be directed to your Wix dashboard, which is your central hub for managing your website.
3. Create or Select the Webpage:
- If you’re starting from scratch and haven’t created a webpage yet, follow these steps to create a new page: a. Click on the “Site” menu on your dashboard. b. Select “Site Pages” to view your existing pages. c. Click on “Add Page” to create a new webpage. d. Choose a template or start with a blank page, depending on your preference. e. Name your new page and click “Done.”
- If you already have a webpage where you want to add the picture to a lightbox, simply navigate to that page in your Wix dashboard.
4. Familiarize Yourself with the Wix Editor:
- The Wix Editor is the platform where you’ll make all your website customizations, including adding images to lightboxes. Take some time to explore its features if you’re new to Wix.
Now that your Wix website is set up, you’re ready to proceed with the process of adding a picture to a lightbox. This next step will involve uploading or selecting the image you want to showcase in the lightbox.
Before you move on, make sure you have the image file you want to use readily available on your computer or in your Wix media library.
Uploading or Selecting the Picture
To add a picture to a lightbox on your Wix website, the next step is to either upload a new image or select an existing one from your media library. Wix provides the option to directly upload a new image or choose from the ones that you’ve already added to your media library. Here’s how you can do it:
A. Uploading a New Image:
- Access the Wix Editor:
- Log in to your Wix account, and from your dashboard, click on the website you’re working on to access the Wix Editor.
- Navigate to the Page:
- If you’re not already on the webpage where you want to add the image, use the page menu on the left to navigate to the correct page.
- Add an Image Element:
- Click on the spot where you want to add the image or click the “+ Add” button.
- Choose “Image” from the List of Elements:
- In the element library that appears, find and select “Image” from the list.
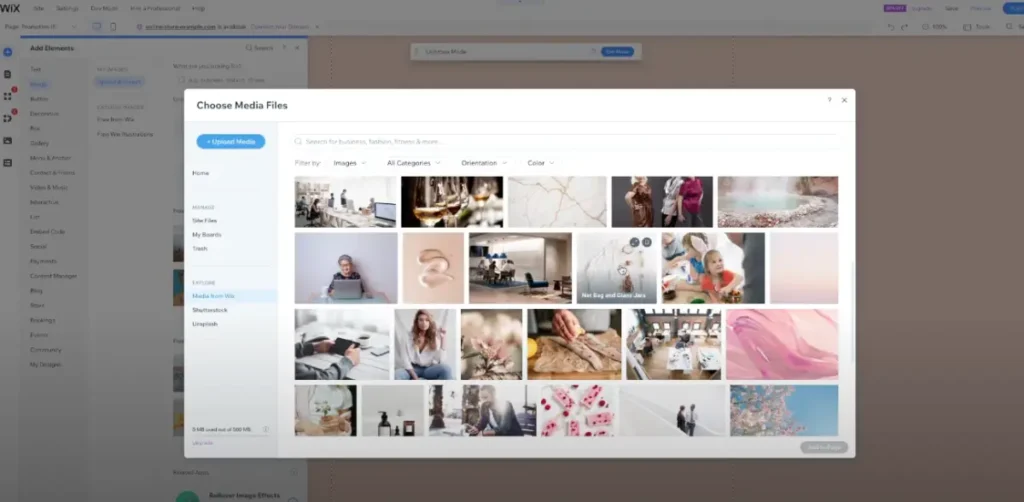
- Upload the Desired Picture:
- You’ll now have the option to upload the image from your computer.
- Click on the “Upload Media” button and select the image file you want to use.
- Once uploaded, the image will be placed on your webpage.
B. Selecting an Existing Image:
- Access the Wix Editor:
- Log in to your Wix account and open the Wix Editor for your website.
- Navigate to the Page:
- If you’re not on the desired webpage, use the page menu on the left to find and select the correct page.
- Click on the Image You Want to Use:
- If you already have the image you want to use in your media library, simply click on the image element within your webpage to select it.
- Edit the Image Properties (Optional):
- In the properties panel on the right-hand side, you can make adjustments to the image, such as resizing, cropping, or adding alt text for accessibility.
After you have uploaded a new image or selected an existing one, the next step will be to create a lightbox that will display the image in an engaging and interactive way. The following sections of this guide will cover how to achieve this.
Creating a Lightbox
If you’ve already uploaded or selected the image that you want to display in a lightbox on your Wix website, the next step is to create the lightbox itself. Simply put, a lightbox is an overlay element that appears when a user interacts with a specific trigger, such as clicking on an image. To create a lightbox, follow these steps:
A. Access the Wix Editor:
- Log in to your Wix account and open the Wix Editor for your website.
B. Navigate to the Page:
- If you’re not already on the webpage where you added the image, use the page menu on the left to navigate to the correct page.
C. Click on the Image:
- Click on the image that you want to open in the lightbox. This will select the image element.
D. Add a Lightbox Element:
- With the image selected, click the “+ Add” button or the “Add” option in the top menu.
- In the elements panel that appears, scroll down and select “Lightbox” from the list of elements.
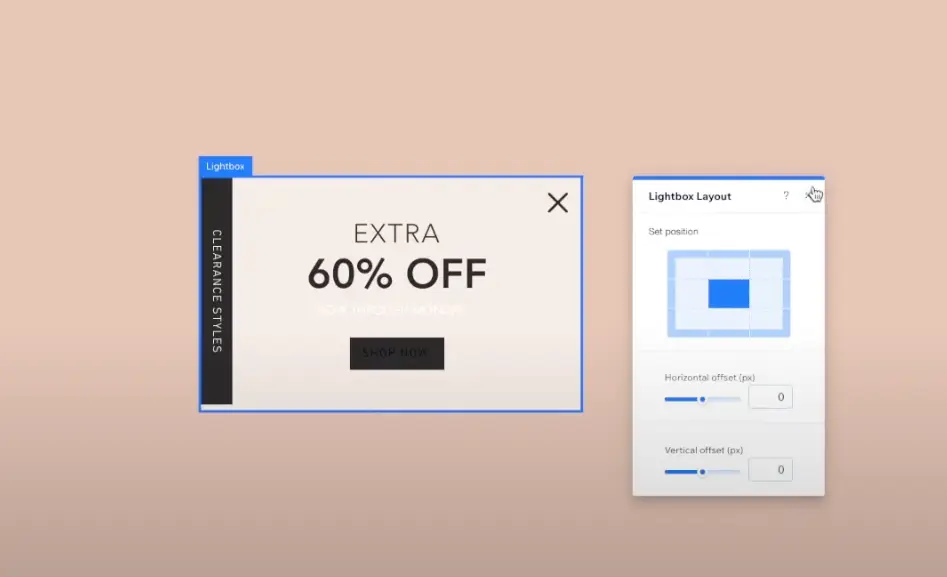
E. Customize the Lightbox Settings:
- A lightbox settings panel will appear on the left side of the screen. Here, you can customize various aspects of the lightbox, including:
- Lightbox Design: You can change the background color, overlay opacity, and add animations to the lightbox to make it visually appealing.
- Lightbox Content: You can add a title, description, and other content that will be displayed alongside the image in the lightbox.
- Lightbox Behavior: You can configure how the lightbox opens and closes, such as on click or on hover, and set the animation duration.
F. Save Your Changes:
- After customizing the lightbox settings to your liking, make sure to click the “Save” button to apply the changes.
Now that you’ve created the lightbox and customized its appearance and behavior, the next step is to link the image you selected earlier to the lightbox so that when users interact with the image, it opens the lightbox. This linking process will be covered in the following section.
Linking the Image to the Lightbox
If you want your image to trigger the lightbox when clicked or interacted with, you must connect the image to the lightbox you have created. Here’s how you can establish a link between the image and the lightbox on your Wix website:
A. Select the Image:
- Access the Wix Editor and navigate to the webpage where you added the image and created the lightbox.
- Click on the image that you want to serve as the trigger to open the lightbox. This will select the image element.
B. Access the Linking Options:
- In the properties panel on the right-hand side of the Wix Editor, locate and click on the “Link” option. This is where you’ll set up the link to the lightbox.
C. Choose the “Lightbox” Option:
- In the link options, you’ll see a dropdown menu labeled “Link To.” Click on this dropdown menu, and you should find an option for “Lightbox.” Select “Lightbox” from the menu.
D. Select the Lightbox You Created:
- After selecting “Lightbox,” another dropdown menu labeled “Choose Lightbox” or a similar option will appear. Click on it to reveal a list of available lightboxes on your page.
- From the list, choose the specific lightbox that you created earlier to display this image. This connects the image to the lightbox you want to open when the image is clicked.
E. Save Your Changes:
- Once you’ve selected the appropriate lightbox, make sure to click the “Save” button or any equivalent option to apply the link settings to your image.
F. Test the Lightbox:
- To ensure everything is working as expected, preview your website. Navigate to the webpage where you linked the image to the lightbox, and click on the image. The lightbox should open, displaying the image you linked to it along with any additional content and customizations you applied earlier.
Congratulations! By linking the image to the lightbox, you have added an interactive feature to your Wix website that is sure to engage visitors and showcase your content in an elegant manner. In the next step, you can test the lightbox functionality to ensure that it works as intended
Testing the Lightbox
After you’ve linked an image to the lightbox on your Wix website, it’s important to test the lightbox functionality to make sure it works properly. To do this, you can perform a quick check to ensure that the lightbox opens correctly, and that your image and content are displayed as expected.
A. Preview Your Website:
- Access the Wix Editor if you’re not already in it.
- Navigate to the webpage where you linked the image to the lightbox.
- In the Wix Editor, look for the “Preview” button or a similar option that allows you to preview your website. Click on it.
B. Interact with the Image:
- In the website preview mode, locate the image you linked to the lightbox.
- Click on the image to interact with it. Depending on your settings, the lightbox should open when the image is clicked.
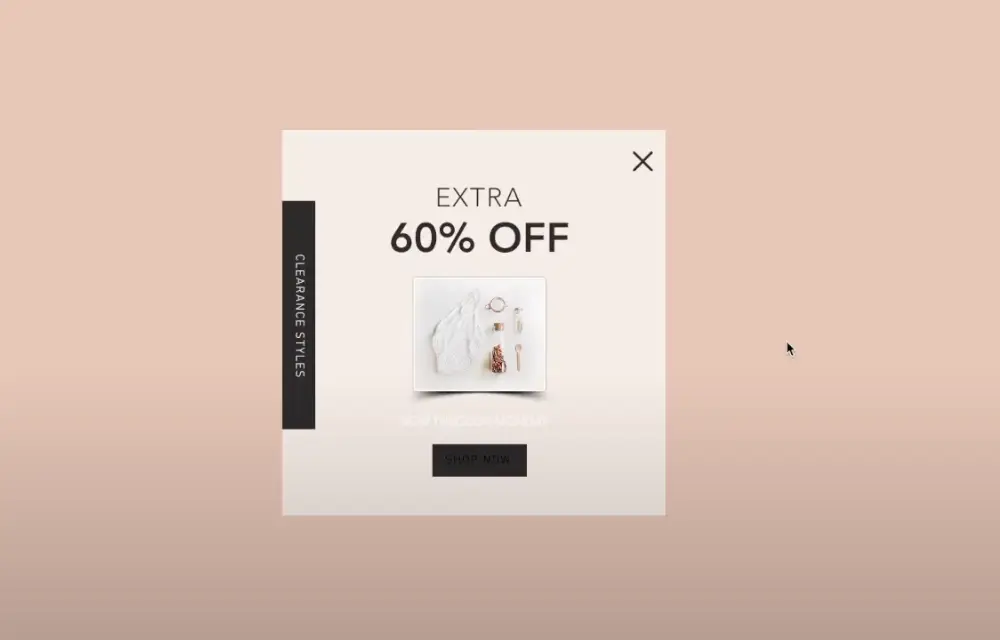
C. Verify Lightbox Functionality:
- Ensure that the lightbox opens smoothly without any errors or glitches.
- Confirm that the image you linked to the lightbox is displayed within the lightbox as the main content.
- Check if any additional content or information you added to the lightbox, such as a title, description, or caption, is visible as expected.
D. Test Navigation and Close Functionality:
- If you’ve configured the lightbox to include multiple images or content, test the navigation within the lightbox to move between items, if applicable.
- Verify that you can easily close the lightbox, either by clicking on a designated close button or by clicking outside the lightbox, depending on your settings.
E. Ensure Mobile Responsiveness (Optional):
- If your website is responsive for mobile devices, test the lightbox on various screen sizes to ensure it functions well and looks good on mobile devices.
F. Make Necessary Adjustments:
- If you encounter any issues during testing, such as the lightbox not opening, content not displaying correctly, or other unexpected behavior, return to the Wix Editor to make adjustments as needed.
G. Publish Your Website:
- Once you are confident that the lightbox works correctly and enhances your website’s user experience, you can proceed to publish your Wix website to make the changes live.
Additional Customizations (Optional)
You have already added a picture to a lightbox on your Wix website and made sure that it works properly. However, there are additional customizations that you can apply to the lightbox to improve its appearance and behavior based on your unique requirements and preferences. Here are some optional customizations that you might want to consider:
A. Adjusting Lightbox Design:
- Background Color: You can change the background color of the lightbox to match your website’s color scheme. Choose a color that complements your overall design.
- Overlay Opacity: Modify the opacity of the overlay behind the lightbox. Adjusting this can make your lightbox stand out more or blend subtly with the background.
- Animations: Experiment with different animation styles for the lightbox, such as fade-in, slide-in, or zoom-in effects. Choose animations that create a visually appealing transition.
B. Adding More Content:
- Image Caption: Include a caption or title for the image displayed in the lightbox. Captions can provide context or descriptions for your images.
- Description: Add a description or additional information about the image in the lightbox. This can be useful for providing details, credits, or context.
C. Configuring Lightbox Behavior:
- Opening Trigger: Customize how the lightbox opens. You can set it to open when an image is clicked, when a button is clicked, or even when a user hovers over an element.
- Navigation: If you have multiple images in the lightbox (e.g., a gallery), configure navigation arrows or thumbnails to allow users to scroll through the images easily.
- Close Button: You can add a close button inside the lightbox, making it more user-friendly for visitors to exit the lightbox.
- Auto Play (Slideshow): If you have a gallery of images in the lightbox, consider enabling an auto-play feature to automatically cycle through the images.
D. Mobile Optimization:
- Responsive Design: Ensure that your lightbox is responsive and functions well on various screen sizes, including mobile devices and tablets.
- Mobile-Specific Customizations: Adjust lightbox settings specifically for mobile devices if needed. This might include changing the size of elements or using different animations for mobile users.
E. Accessibility Considerations:
- Alt Text: For images within the lightbox, provide descriptive alt text to ensure that users with visual impairments can understand the content.
F. Advanced Customizations (Advanced Users):
- Custom CSS: If you have coding skills, you can further customize the lightbox’s appearance and behavior using custom CSS code. Wix provides an option to add custom code to your site.
It’s important to strike a balance when customizing your lightbox. While customizations can improve your lightbox’s visual appeal and functionality, overly complex or flashy effects can sometimes detract from the user experience. It’s essential to test any customizations thoroughly to ensure they work as intended and contribute positively to your website’s design and usability.
Taking the time to refine and personalize your lightbox can help you create a more engaging and memorable experience for your website visitors. So, it’s worth investing the effort to get it right.
Publishing Your Website
Once you have added an image to a lightbox, customized it to your preferences, and ensured that it is functioning as intended, the last step is to publish your Wix website. By publishing, you make your changes live and accessible to your website visitors. Here are the steps to follow in order to publish your website:
A. Save Your Work:
- In the Wix Editor, ensure that all your recent changes, including lightbox customizations, are saved. Look for a “Save” or “Publish” button and click it.
B. Preview Your Website (Optional):
- Before publishing, it’s a good practice to preview your website one last time to double-check that everything looks and works as expected. Use the “Preview” button or option in the Wix Editor to do this.
C. Publish Your Website:
- Once you’re satisfied with how your website looks and functions, it’s time to publish it. Locate the “Publish” button in the Wix Editor, usually located in the top right corner.
- Click the “Publish” button. You may be prompted to confirm your decision.
D. Choose a Domain (if applicable):
- If you’re using a custom domain (e.g., www.yourwebsite.com), make sure it’s properly configured in your Wix account. You can typically do this in the “Settings” or “Domain Management” section.
- Confirm that the domain settings are correctly pointing to your Wix site.
E. Publish Your Site:
- After confirming your domain settings (if applicable), click the “Publish” or “Update Live Site” button. This will make your website accessible to the public.
F. Wait for Propagation (if using a new domain):
- If you’re using a new custom domain or recently made changes to your domain settings, it might take some time for DNS changes to propagate across the internet. This process can take several hours to up to 48 hours. During this time, some users may see the old version of your site, while others see the updated one.
G. Verify Your Live Website:
- After publishing, open a web browser and visit your website using its URL (e.g., www.yourwebsite.com). Confirm that your website is live and that the lightbox functionality works as expected on the live site.
H. Promote Your Website:
- Now that your website is live, share it with your audience, promote it on social media, and consider implementing SEO strategies to improve its visibility on search engines.
I. Monitor and Maintain:
- Regularly monitor your website for any issues, updates, or changes. As your content evolves, continue to keep your website fresh and engaging for your visitors.
Your Wix website with the picture in a lightbox is now live and accessible to the world! Congratulations! It’s important to remember that your website is a work in progress and can continue to be updated and improved over time to better meet your needs and preferences. Publishing your website is just the beginning of your online journey, and maintaining it is key to its long-term success.
Additional Guide
Learn how to take your Wix website offline by following our step-by-step guide on ‘How to Unpublish Wix Site.’ Whether you’re making updates, conducting maintenance, or simply need to hide your website temporarily, we’ll walk you through the process to ensure your site remains hidden from public view until you’re ready to go live again. Read the full article at How to Unpublish Wix Site and take control of your website’s visibility.
Conclusion
We have provided you with a step-by-step guide on how to get a picture in a lightbox Wix website. A lightbox is a feature that enhances the way you showcase images to your website visitors, creating a more interactive and visually appealing experience. By following the steps outlined in this comprehensive guide, you can easily incorporate this powerful tool into your website and make it stand out from the rest.