WordPress is widely used for website building and management system. If you’re looking to know how to uninstall WordPress from Cpanel it could be a difficult task. To aid you through your process we’ve developed this guide that will ensure you are able to remove WordPress from cPanel in a safe and secure manner without difficulties.
Before we dive into the details, it’s important to stress the importance of careful planning and preparation. Uninstallation can result in data loss and website downtime if not done correctly. Therefore, we’ll start by guiding you through the necessary precautions, including backups and file downloads, to ensure that your content and settings are protected.
Whether you’re switching to a new CMS, freeing up your hosting space, or exploring other options for your online presence, this guide will be your reliable companion as you gracefully bid adieu to your WordPress site via cPanel. Let’s get started!
Preparing for Uninstallation: How to Uninstall WordPress from Cpanel
If you are planning to uninstall WordPress from cPanel, it is crucial to prepare adequately to avoid data loss and complications during the process. Here are some essential steps that you should follow to ensure a smooth uninstallation process:
1. Backing up your WordPress website
Before uninstalling WordPress from cPanel, backup your website. Why are backups essential? Backups are essential because they provide a safety net in case of any unforeseen circumstances or mistakes during the uninstallation process. It helps to protect all the valuable data, content, and configurations that have been built over time. In the event of a website crash or loss of data, having a backup ensures that you can easily restore your website to its previous state without any major setbacks or loss of information.
Methods to create backups:
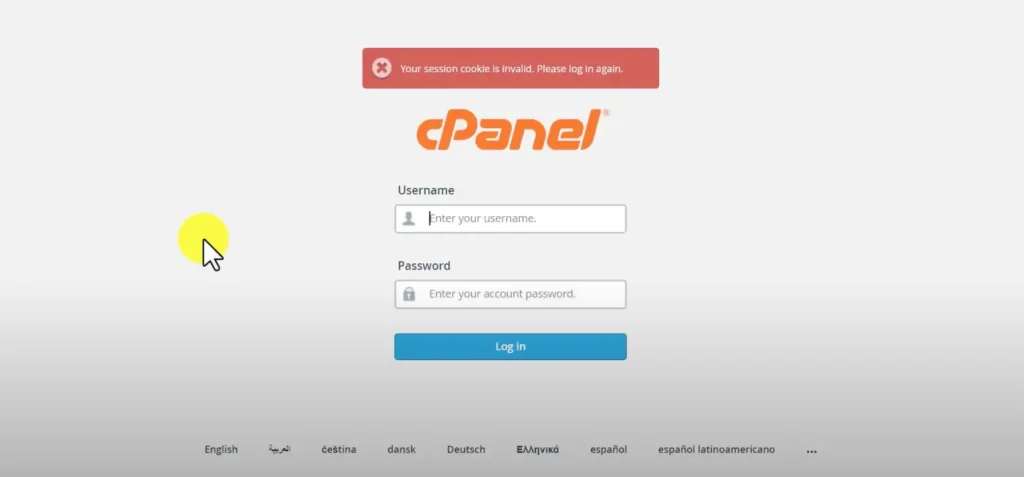
- Log in to your cPanel account.
- Navigate to the “Backup” or “Backups” section.
- Create a full backup of your account, including your website files and databases.
- Download the backup to your local computer for safekeeping.
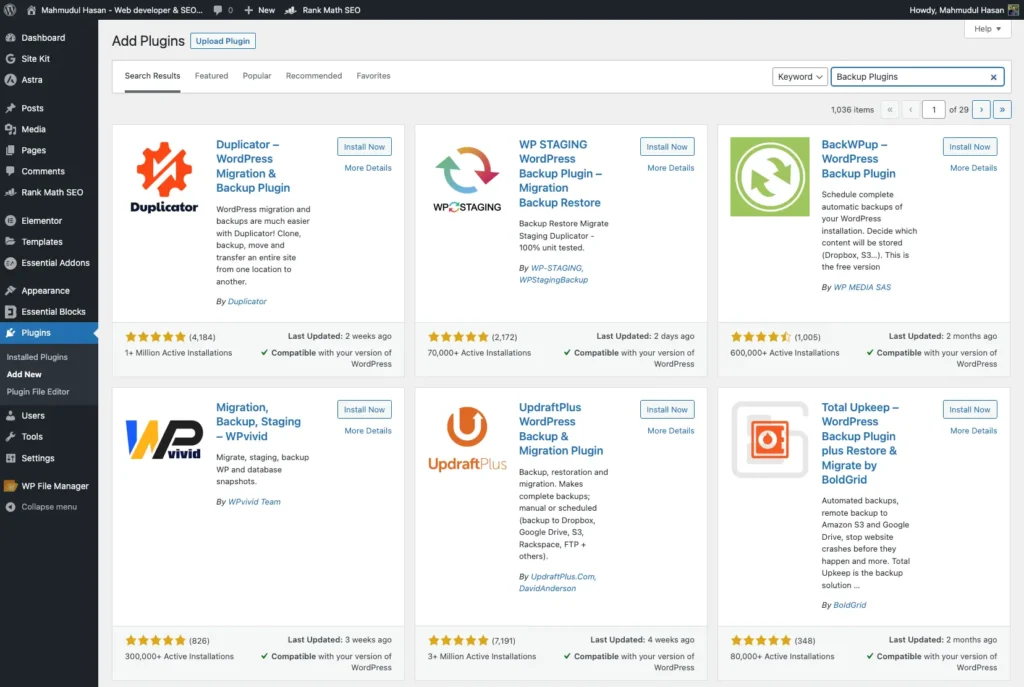
Using WordPress Backup Plugins:
- Install a trusted backup plugin like UpdraftPlus or BackupBuddy from your WordPress dashboard.
- Configure the plugin settings to schedule regular backups.
- Create an immediate backup of your website, including files and databases.
- Download the backup files to your computer.
2. Downloading important files
Accessing WordPress files via FTP:
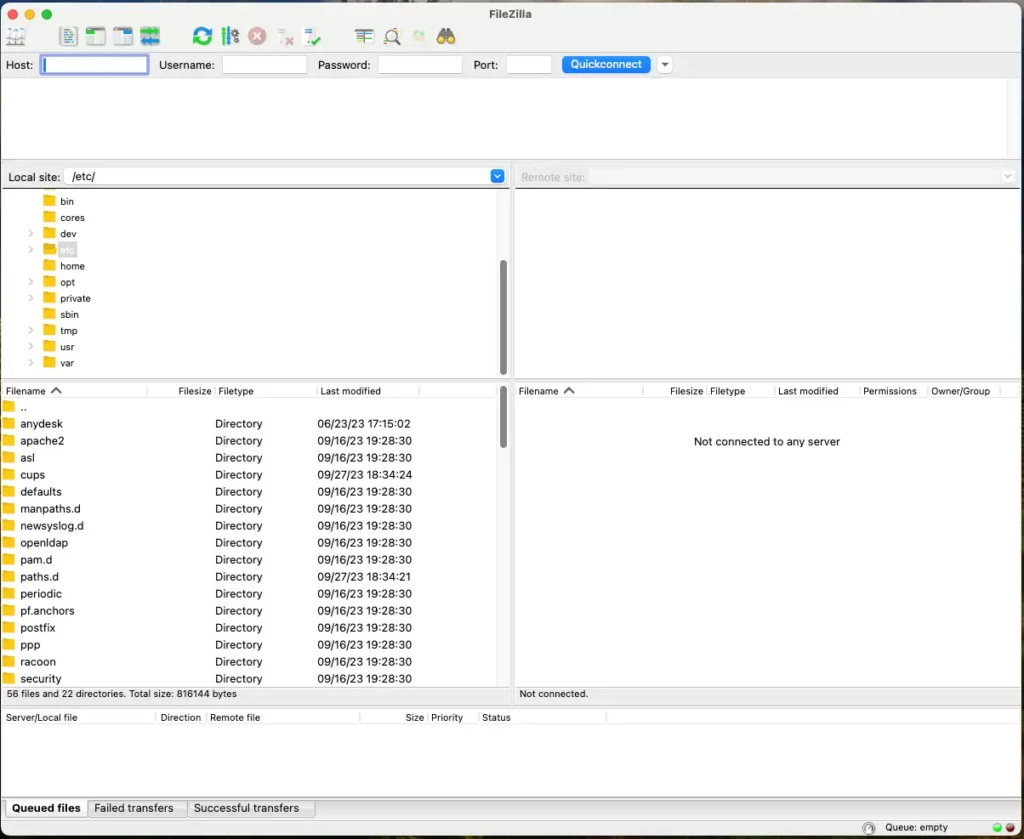
- To ensure you have copies of essential WordPress files, you can use an FTP (File Transfer Protocol) client like FileZilla. Here’s how:
- Download and install an FTP client like FileZilla.
- Open FileZilla and connect to your web server using your FTP credentials (provided by your hosting provider).
- Navigate to the directory where your WordPress website files are located (usually, it’s the “public_html” directory).
- Select and download all the files and folders related to your WordPress website to your local computer.
Identifying and saving critical files:
- Ensure you have copies of these essential files and folders:
- wp-config.php: This file contains your database connection information and is crucial for WordPress to function. Make a copy and store it safely.
- wp-content: This folder contains your themes, plugins, uploads, and other customizations. Download the entire folder.
- Any other custom files or folders specific to your website, like .htaccess or robots.txt.
Accessing cPanel & Uninstalling WordPress
After creating backups and downloading essential files, follow these steps to uninstall WordPress from cPanel.
1. Accessing the WordPress Manager:
- Log in to your cPanel account using your credentials provided by your hosting provider.
- Once logged in, navigate to the “Software” or “Applications” section of cPanel. The exact location may vary depending on your hosting provider’s setup.
- Look for an option like “WordPress Manager,” “Softaculous,” or “Installatron.” Click on it to access the WordPress installation list.
2. Selecting the WordPress site you want to uninstall:
- In the WordPress Manager or equivalent, you’ll see a list of WordPress installations associated with your cPanel account.
- Identify the specific WordPress site you want to uninstall from the list and select it.
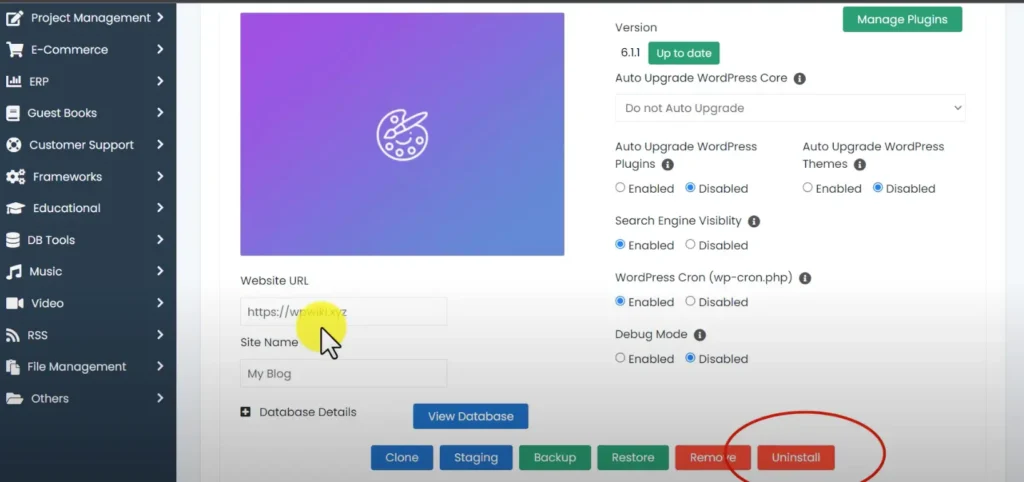
3. Clicking on the Uninstall option:
- After selecting your WordPress site, you should see an option to “Uninstall” or “Remove.” Click on this option to initiate the uninstallation process.
4. Confirming the uninstallation:
- A confirmation prompt will appear, asking you to confirm that you want to uninstall WordPress. Read the warning carefully, as this action is irreversible.
- Confirm your decision to proceed with the uninstallation.
5. Waiting for the process to complete:
- The uninstallation process will begin, and cPanel will automatically remove the WordPress files and databases associated with the selected site.
- Be patient and allow the process to finish. It may take a few moments.
6. Dealing with potential errors:
- If you encounter any errors during the uninstallation process, note the error message provided. Common issues might include database connection problems or file permission errors.
- If you’re unsure how to resolve an error, contact your hosting provider’s support for assistance.
After the uninstallation process of WordPress from cPanel is complete without any errors, it means that you have successfully removed WordPress. It’s important to note that this action cannot be undone. All your website’s data and settings will be permanently deleted. If you ever plan to use WordPress again or need to retrieve your content, you will have to rely on the backups you created earlier.
Cleaning Up the Database
After removing WordPress, it’s crucial to thoroughly clean up the associated database to free up space and ensure no remnants remain. Here’s how to do it:
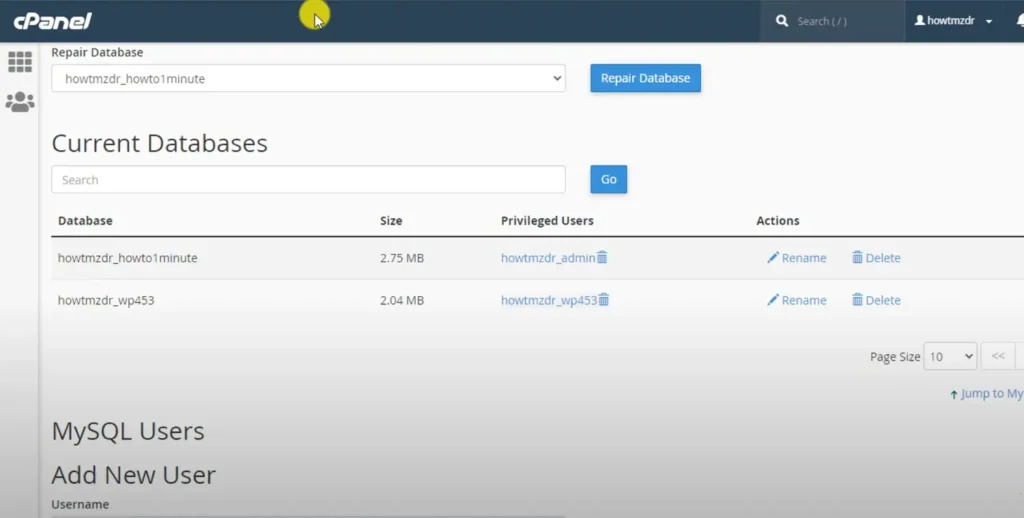
1. Accessing phpMyAdmin via cPanel:
- Log in to your cPanel account.
- Scroll down to the “Databases” section and click on the “phpMyAdmin” icon. This will open the phpMyAdmin interface, a tool for managing MySQL databases.
2. Locating the WordPress database:
- In phpMyAdmin, you’ll see a list of databases on the left sidebar. Identify the database that corresponds to the WordPress site you’ve uninstalled. It usually has a name that includes your cPanel username and the word “wordpress” or the site’s name.
3. Exporting the database (as a backup):
- Before proceeding with database deletion, it’s a good practice to export it as a backup for future reference. To do this:
- Select the WordPress database.
- Click on the “Export” tab in the top menu.
- Choose the export method (typically “Quick” is sufficient) and click the “Go” or “Export” button. Save the resulting SQL file to your computer.
4. Deleting the WordPress database:
- With your backup safely stored, you can now proceed to delete the WordPress database. Here’s how:
- In phpMyAdmin, select the WordPress database again.
- Look for the “Operations” tab at the top.
- Under the “Table Options” section, you may find an option to “Drop the database (DROP).” Click on it to initiate the deletion.
5. Confirming the deletion:
- A confirmation message will appear, warning you about the irreversible nature of this action. Confirm your decision to drop the database.
6. Checking for any remaining database tables:
- After deleting the database, it’s a good practice to check for any remaining tables that might not have been deleted automatically. To do this:
- In phpMyAdmin, select the database once more.
- Click on the “Structure” tab.
- Review the list of tables. If there are any tables remaining, select them and use the “Drop” option to delete them.
After removing all traces of WordPress data from your cPanel account, you have freed up space on your hosting server and minimized the chances of any residual issues.
Removing Files and Folders
When completely uninstalling WordPress from cPanel, it’s important to remove all associated files and folders. Here’s a step-by-step guide on how to do it after cleaning up the WordPress database
1. Accessing File Manager in cPanel:
- Log in to your cPanel account.
- Scroll down to the “Files” section and click on the “File Manager” icon. This will open the File Manager interface, which allows you to manage files and directories on your hosting account.
2. Navigating to the WordPress directory:
- In the File Manager, you should see a list of directories. Navigate to the directory where your WordPress website files are located. Typically, this is the “public_html” directory, but it may vary depending on your hosting setup.
3. Selecting and deleting WordPress files:
- Inside the WordPress directory, select all the files and folders related to your WordPress installation. You can do this by clicking on the first file, holding down the “Shift” key on your keyboard, and clicking on the last file to select them all.
- Once all the WordPress files and folders are selected, right-click on them, and choose the “Delete” or “Remove” option from the context menu.
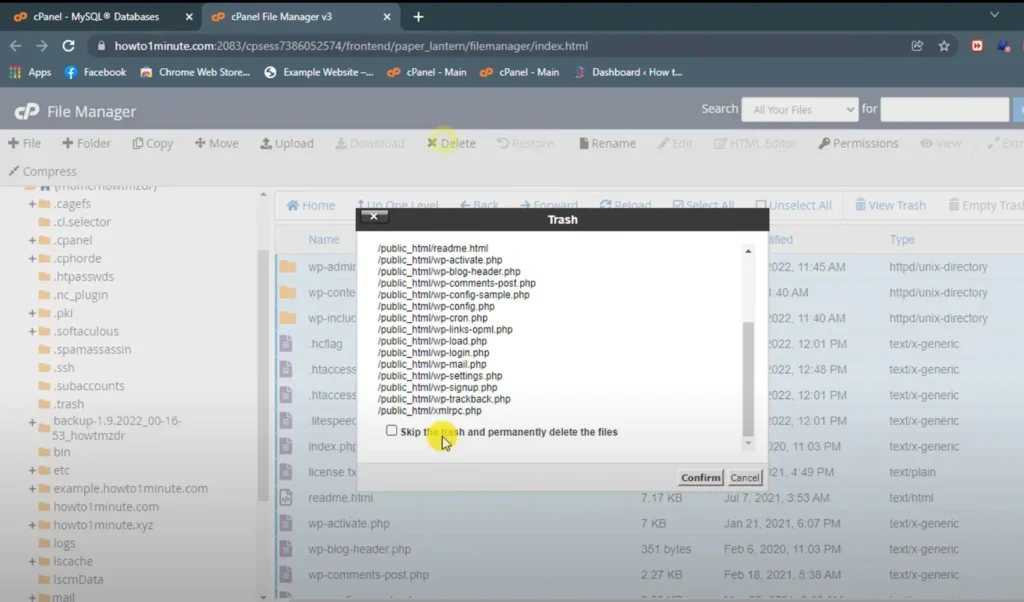
4. Deleting the WordPress directory:
- After deleting the individual files, the WordPress directory should be empty. You can now right-click on the empty directory itself and choose “Delete” or “Remove” to delete the directory itself.
5. Confirming the deletion:
- A confirmation dialog will appear to confirm the deletion of files and directories. Confirm your decision to delete these files and folders.
6. Emptying the trash (optional):
- Some hosting providers have a “Trash” or “Recycle Bin” feature in the File Manager. If your host has this feature and you used it, make sure to empty the trash to permanently delete the files.
Congratulations! By following these steps, you have successfully deleted all WordPress files and folders from your hosting account. This ensures that there are no leftovers that could consume server space or result in unintended access to WordPress files. This step is essential for maintaining a clean and organized hosting account.
Additional Cleanup Steps
After completing the steps of uninstalling WordPress, removing the associated database, and deleting the WordPress files and folders, there are a few additional cleanup tasks that you should perform to ensure that your hosting environment is optimized and ready for any future endeavors. Below are the steps that you should follow to complete the cleanup process:
1. Removing any remaining WordPress-related files or directories:
- Double-check your hosting account for any residual WordPress files or directories that might not have been deleted in previous steps. These can include configuration files like
.htaccess,wp-config.php, or any stray folders. - If you find any, select and delete them.
2. Checking and adjusting your domain settings:
- If you’re not planning to use the same domain for a new website or application, consider removing it from your hosting account to prevent accidental access to WordPress remnants.
- In cPanel, navigate to the “Domains” section and manage your domain settings accordingly.
3. Verifying that your website is no longer accessible:
- Open a web browser and try accessing your former WordPress website’s URL. Ensure that you see a 404 error or a “Site not found” message indicating that the website is no longer accessible.
4. Clearing your browser cache:
- Sometimes, your browser might cache previous versions of your website, making it appear as if it’s still there. Clear your browser’s cache and cookies to ensure you’re viewing the most up-to-date version of your site.
5. Reviewing your hosting plan:
- If you no longer plan to use your hosting account for a website, consider downsizing your hosting plan or cancelling it if it’s no longer needed. This can help you save on hosting costs.
6. Documenting the process:
- Keep a record of the steps you’ve taken, including backup locations, file deletions, and database clean-up. This documentation can be valuable for future reference or troubleshooting.
7. Exploring alternatives:
- If you’re moving away from WordPress, consider exploring alternative CMS platforms or website builders that better suit your current needs.
It’s important to follow these additional cleanup steps to ensure that your hosting environment is clean, optimized, and ready for your next web-related project. Whether it involves reinstalling WordPress, trying a new CMS, or pursuing a different online endeavor, proper cleanup not only keeps your hosting account organized, but also enhances security and performance. So, make sure to take these steps to keep your hosting account in top shape.
Additional Resources:
For managing WordPress and exploring ChatGPT’s capabilities, here are some related articles that might be useful:
- How to Convert From Container to Column WordPress
- Link: How to Convert From Container to Column WordPress
- Description: Learn how to modify the layout of your WordPress website by converting from a container-based design to a column-based one. This article provides step-by-step instructions and tips for improving your site’s aesthetics and user experience.
- Can ChatGPT Create a Website?
- Link: Can ChatGPT Create a Website?
- Description: Explore the capabilities of ChatGPT in website creation. This article delves into the concept of using AI to generate website content and design suggestions. Discover how ChatGPT can assist you in streamlining the web development process.
Here are some great resources that can help you learn more about customizing WordPress and the potential of AI, specifically ChatGPT, in web-related tasks. If you want to improve your website’s design or are interested in understanding the role of AI in website creation, these articles will provide you with valuable insights, guidance and perspectives.
Conclusion
In the end, hopefully you have understood how to uninstall WordPress from Cpanel. Uninstalling WordPress from cPanel is a significant step that marks the end of one digital journey and the beginning of another.
In this guide, you have learned how to safely and thoroughly uninstall WordPress. Keep in mind that this process can open doors to new possibilities, whether you are transitioning to a different CMS, exploring alternative website-building methods, or simply decluttering your hosting environment.

